Last updated on August 7th, 2021 at 11:16 am
Overclocking is the process of increasing the clock rate of a computer to improve its performance. Overclocking Increases the operating speed component. Normally in Modern systems, Overclocking is Performed in a Component Like a processor or graphics controller to Improve its overall Performance. In this article, we will Discuss the Detailed Guide on How to overclock Monitor.
Overclocking Your Monitor Exceeds the Refresh Rate which gives You a Smooth Experience while Playing Games or watching videos. However, the Practice of overclocking can Damage the Components and shortened the lifespan of Your Computer. Though if You Follow the steps we have mentioned in this article, it will be fairly safe to overclock Your Monitor without Damaging It.
The Main AIM of overclocking is to Reduce the power consumption of Your PC Components. This Way You can reduce the computer’s power consumption, increase battery life for Better System Stability.
Note – Before we Move Further with the Guide on How to overclock Monitor, Overclocking sometimes Damages Your System. It will Reduce the Lifespan of Your Hardware Because of Extra Heat Generation.
So make Sure You Check Your Monitor Warranty/ Guarantee before Performing the overclocking. To avoid any Damage, Please follow the Steps Mentioned Carefully.
Table of Contents
How to overclock Monitor Using Custom Resolution Utility
Overclocking Your Monitor is an effortless method. CRU is one of the oldest Methods of overclocking the monitor. But it might be Not compatible with Intel Integrated GPUs. Custom Resolution Utility should work fine with AMD graphics.
Step 1 – Download the Customer Resolution Utility, click Here.
Step 2 – Open CRU, Now You will See Two different Boxes. Detailed Resolution & Standard Resolution.
Step 3 – Click on Add, Under the Detailed Resolution.
Step 4 – Next, click on Timing & change it to LCD standard.
Step 5 – Now You have to change the Refresh Rate which is Higher than the standard value.
Step 6 – Click on Ok and Restart Your Computer.
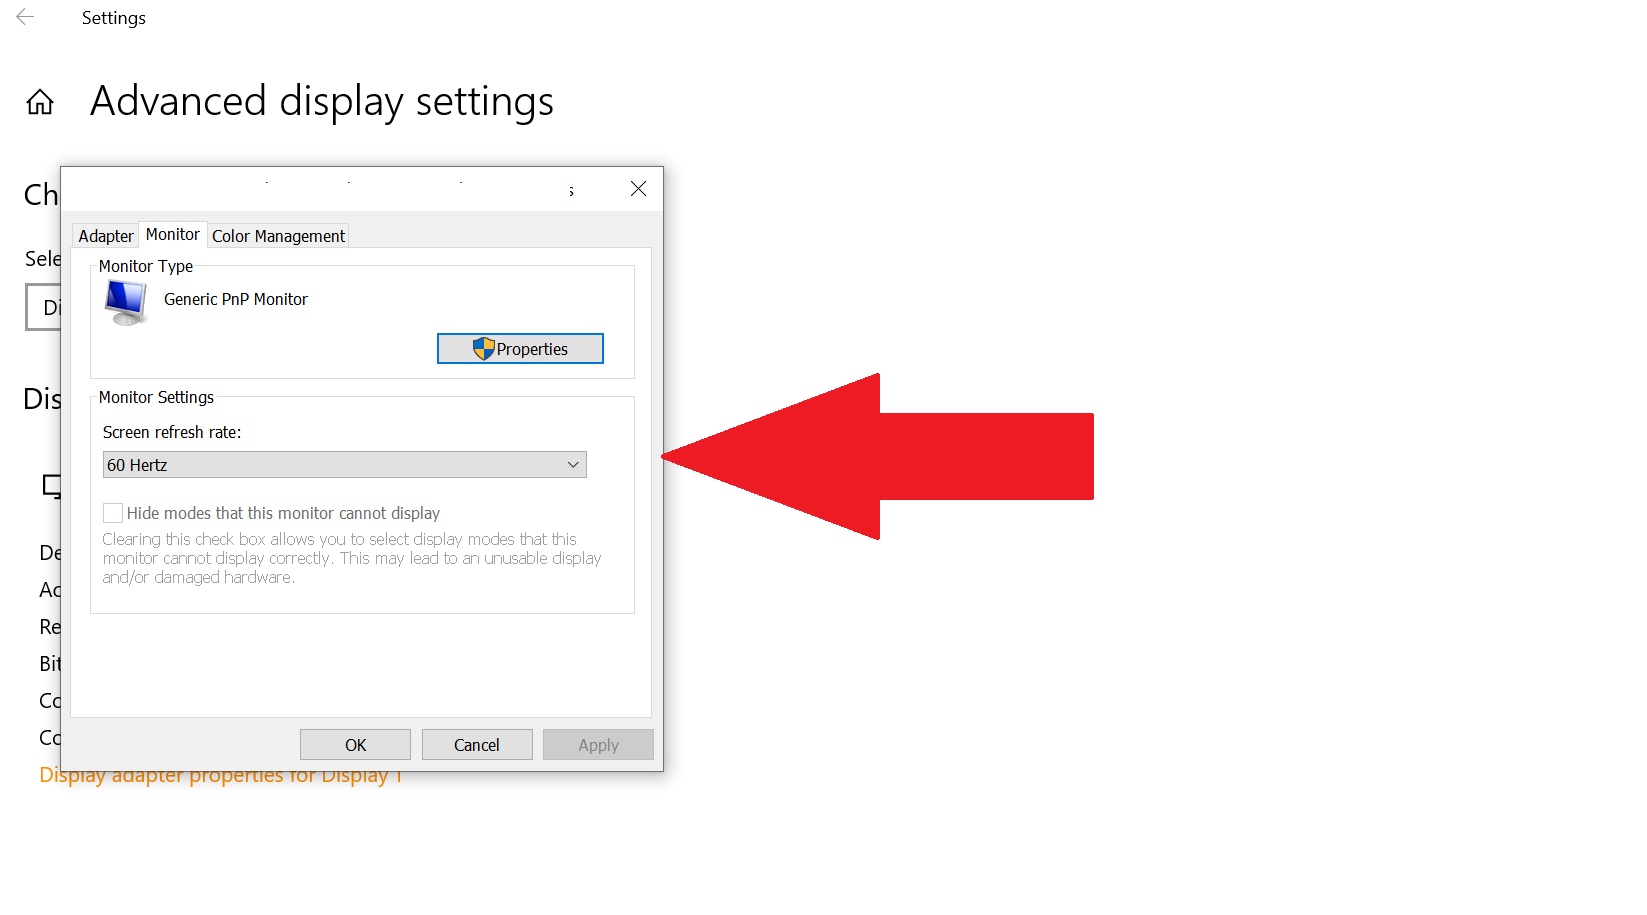
Now You have to change the Refresh Rate in Your Windows 10. Follow the Steps Mentioned below for the Same.
Step 1 – Select Display Setting By Right-clicking on Your Desktop.

Step 2 – Click on Advanced Display Setting.

Step 3 – Select Display Adaptor Properties

Step 4 – Navigate to Monitor & Select the Refresh rate From Drop the Drop Down Menu.

If You have Done everything in the Right Way, You will see a Visible Difference in Your Monitors performance.
Overclocking utilizing AMD Radeon settings
To Get Similar Results with Your AMD Card, You can use the Radeon settings Options. Please Follow the Steps Mentioned Below.
Right-click on Desktop and open Radeon settings. Click on Create which is There Next to Custom Resolutions. Now Change the refresh rate According to Your Need & Click on Save. Restart Your computer to apply all the Setting Properly.
My personal Experience with overclocking
Overclocking is Not Rocket Science, if You are an Enthusiast and interested in PC gaming and technology, You should Give it Try. As a gamer, one of the Biggest issues I use to face is Low Frame Rate. Overclocking my Computer helped me to increase the number of frames.
Final Words
There are always two sides to the coin, Overclocking my Enhance the Performance But You should Always keep Few things in Mind while Overclocking Your Components.
Ensure that all the Components are Provided with adequate power at a voltage sufficient to work at the new clock rate. Hope this Article Clears all Your Queries about How to overclock monitor. Share Your Doubts in the Comment Section Below and We will get back to You Soon.
READ MORE

